For drivers, applying to a position at a new carrier can feel like looking at a two-way mirror; the carrier can see everything about you, but you have no idea how the recruiting process is going on their end. Are they still reviewing candidates and still haven’t gotten to your application yet? Did they forget to call you back or are they verifying your employment? Is there a holdup with processing your onboarding forms or are they waiting on you to send a copy of your CDL? This lack of equal visibility can leave a driver staring at his reflection and feeling confused.
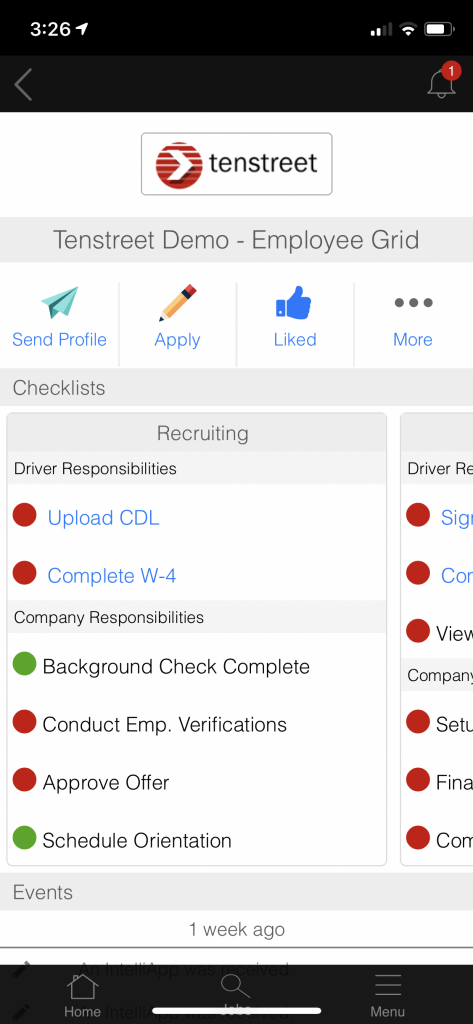
When we created Driver Pulse, we wanted to build a tool that made the recruiting process transparent for both recruiters and drivers. Our latest feature, checklists within Driver Pulse, takes another step toward giving drivers the latest information about where they are in the hiring process and what they need to do to sign onto a new company.
How Do I Set Up Checklists?
Making checklists visible to drivers through Driver Pulse is an optional feature that can be used with your existing checklists or applied to new checklists you create in the future. To add a checklist to Driver Pulse, go to your Pulse Control options and locate your checklists section. Each one will now have a checkbox that, when checked, makes the checklist visible in Driver Pulse. You can then go on to select which items on the list will be visible to drivers. What’s more, you can add new titles for those items that will be visible on the driver’s side if you want to make the next step for the driver more obvious (for example, changing the document name “W4” to “Complete W4” so the driver knows they still have to complete the task of filling out their W4 form). Once you’ve made your checklists visible, drivers will be able to see them within their Driver Pulse app, and can tell exactly what’s happened and what still needs to be done.